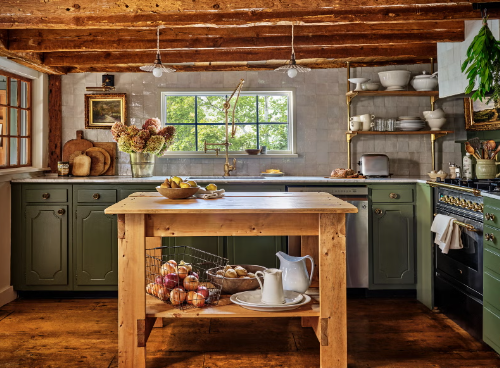
Are you looking to transform your kitchen into a charming farmhouse retreat? Open shelving is a popular choice, allowing for both functionality and aesthetic appeal. With a little creativity and effort, you can create beautiful DIY farmhouse kitchen open shelving that showcases your kitchenware while maximizing space.
1. Choosing the Right Materials
The first step in any DIY project is selecting the appropriate materials. For a farmhouse aesthetic, consider using wood like pine or oak, which adds warmth and durability. Reclaimed wood is also an excellent option, giving your shelves a rustic look while being environmentally friendly. Remember to choose materials that can withstand the weight of your kitchen items.
In addition to wood, think about your brackets. Metal brackets can add a modern twist, while wooden corbels might enhance the rustic vibe. Don’t forget to properly sand and finish your chosen materials to ensure they fit seamlessly into your kitchen environment.
-
- Choose durable wood for shelving.
-
- Consider reclaimed wood for sustainability.
-
- Match your brackets to your overall theme.
-
- Sand and finish your materials before installation.
-
- Measure your space accurately for a perfect fit.
2. Designing Your Open Shelves
Once you have your materials, the next step is to design how your open shelves will look. A common design includes floating shelves, which have a sleek appearance and can create a more spacious feel. Alternatively, you might opt for traditional shelving units that extend from the wall to the counter, providing a more substantial storage option.
When planning the layout, consider both ease of access and aesthetic balance. You can create a visual focal point by grouping similar items together or incorporating decorative pieces such as vases or framed photos between functional items like dishes and utensils.
-
- Sketch your design on paper or use design software.
-
- Consider varying shelf heights for visual interest.
-
- Balance your arrangement with functional and decorative items.
-
- Ensure all items are easily accessible yet look well-organized.
-
- Test your design with mock-ups before installation.
3. Installation Tips for Success
Installing open shelving requires precision and patience. Start by accurately marking where the shelves will go, ensuring they’re level and aligned. It’s crucial to locate wall studs when mounting shelves to ensure they can bear the weight of kitchen items. Use a stud finder and mark these points clearly for your installation.
When drilling, use proper screws that fit your brackets and the type of wall you’re attaching them to. Avoid shortcuts; take your time measuring and leveling each shelf before securing it in place. Once installed, take a step back to assess the arrangement and make slight adjustments as needed.
-
- Use a stud finder to locate wall studs.
-
- Double-check measurements for level alignment.
-
- Secure shelves with appropriate screws for stability.
-
- Rest items on shelves only after ensuring a secure installation.
-
- Make small adjustments for an aesthetically pleasing arrangement.
4. Styling Your Open Shelves
With your open shelves installed, it’s time to style them! Choose kitchenware that not only serves a purpose but also adds color and texture to your kitchen. Mixing materials—like ceramic, glass, and metal—can create visual interest. Arrange items by height, with taller items in the back and shorter ones in the front for a coherent look.
Incorporate personal touches, like family heirlooms or artwork, to make the shelves feel uniquely yours. Seasonal decorations can also be fun! Change your displays periodically to keep the kitchen feeling fresh and inviting.
-
- Select a mix of materials for visual diversity.
-
- Use varying heights to create depth.
-
- Incorporate personal items for a unique touch.
-
- Experiment with seasonal decor for a fresh look.
-
- Keep the styling practical—don’t overcrowd the shelves.
5. Maintenance and Upkeep
Once your open shelving is complete, maintenance becomes key to keeping it looking its best. Regular cleaning is essential; dusting shelves and wiping down items with a gentle cleaner will prevent dirt buildup. It’s important to periodically check for stability, making sure shelves remain securely attached and that no warping has occurred over time.
Another maintenance tip includes rearranging items occasionally, not just for aesthetics but also to ensure everything stays organized and functional. This will also give you a chance to reassess what’s necessary for your kitchen and what can be stored away.
-
- Dust shelves regularly to prevent buildup.
-
- Use a gentle cleaner for everyday maintenance.
-
- Inspect the stability of shelves every few months.
-
- Rearrange items periodically to keep things fresh.
-
- Evaluate your storage needs and adjust accordingly.
Creating DIY farmhouse kitchen open shelving projects is a fun and rewarding endeavor that can significantly enhance the look and feel of your cooking space. With thoughtful planning and execution, you can achieve a balance of style and functionality that reflects your personality. So gather your materials, get creative, and start your project today!